相信大家都很想取爬取某些网站的内容,图片,但是不知道怎么动手,以下的教程就是从0开始教大家爬取某个网站图片
准备工作:
curl封装类(需要curl扩展);
php redis扩展(用于使用redis)
redis服务器(用于队列)
QueryList插件:https://querylist.cc/ 实现php选择html DOM
运行环境:本文在php-cli模式下运行,不需要考虑超时时间
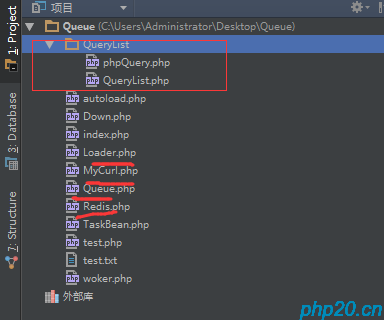
首先,建立个爬取的目录(Queue)
增加Mycurl.php
<?php
/**
 * Created by PhpStorm.
 * User: tioncico
 * Date: 2018/2/26 0026
 * Time: 21:34
 */

namespace Queue;

class MyCurl
{
    private static $url    = ''; // 访问的url
    private static $oriUrl = ''; // referer url
    private static $data   = array(); // 可能发出的数据 post,put
    private static $method; // 访问方式,默认是GET请求

    public static function send($url, $data = array(), $method = 'get')
    {
        if (!$url) exit('url can not be null');
        self::$url    = $url;
        self::$method = $method;
        $urlArr       = parse_url($url);
        self::$oriUrl = $urlArr['scheme'] . '://' . $urlArr['host'];
        self::$data   = $data;
        if (!in_array(
            self::$method,
            array(
                'get',
                'post',
                'put',
                'delete'
            )
        )
        ) {
            exit('error request method type!');
        }

        $func = self::$method . 'Request';
        return self::$func(self::$url);
    }

    /**
     * 基础发起curl请求函数
     * @param int $is_post 是否是post请求
     */
    private static function doRequest($is_post = 0)
    {
        $ch = curl_init();//初始化curl
        curl_setopt($ch, CURLOPT_URL, self::$url);//抓取指定网页
        curl_setopt($ch, CURLOPT_AUTOREFERER, true);
        // 来源一定要设置成来自本站
        curl_setopt($ch, CURLOPT_REFERER, self::$oriUrl);

        curl_setopt($ch, CURLOPT_RETURNTRANSFER, 1);//要求结果为字符串且输出到屏幕上
        if ($is_post == 1) curl_setopt($ch, CURLOPT_POST, $is_post);//post提交方式
        if (!empty(self::$data)) {
            self::$data = self::dealPostData(self::$data);
            curl_setopt($ch, CURLOPT_POSTFIELDS, self::$data);
        }

        $data = curl_exec($ch);//运行curl
        curl_close($ch);
        return $data;
    }

    /**
     * 发起get请求
     */
    public static function getRequest()
    {
        return self::doRequest(0);
    }

    /**
     * 发起post请求
     */
    public static function postRequest()
    {
        return self::doRequest(1);
    }

    /**
     * 处理发起非get请求的传输数据
     *
     * @param array $postData
     */
    public static function dealPostData($postData)
    {
        if (!is_array($postData)) exit('post data should be array');
        foreach ($postData as $k => $v) {
            $o .= "$k=" . urlencode($v) . "&";
        }
        $postData = substr($o, 0, -1);
        return $postData;
    }

    /**
     * 发起put请求
     */
    public static function putRequest($param)
    {
        return self::doRequest(2);
    }

    /**
     * 发起delete请求
     */
    public static function deleteRequest($param)
    {
        return self::doRequest(3);
    }
}
下载图片类Down.php(看完下面的教程再看这个类说明)
<?php

/**
 * Created by PhpStorm.
 * User: tioncico
 * Date: 2018/2/28 0028
 * Time: 19:54
 */
namespace Queue;
use QL\QueryList;

class Down
{
    private static $instance;
    public function __construct() {

    }

    static function getInstance(){
        if(is_object(self::$instance)){
            return self::$instance;
        }else{
            self::$instance = new Down();
            return self::$instance;
        }
    }

    public static function add_img($str){//这里进来的是详情,每个详情有n页,每页一张高清大图
        $id = substr($str,strripos($str,'/')+1);//截取出id
        $res   = \Queue\MyCurl::send($str, array('ip'=>'127.0.0.1'), 'get');
//        var_dump($res);
        $rules = array(
            //采集id为one这个元素里面的纯文本内容
            'page' => array(
                '.pagenavi span',
                'html'
            ),
        );
        $hj    = QueryList::Query($res, $rules);
        $data  = $hj->getData(function ($x) {//总页数
            return $x;
        });
        //获取到了页面元素
        $count = $data[count($data)-2]['page'];//这个是获取倒数第2个,倒数第2个是总页数
        echo '共有'.$count."张图\n";
        for($i=1;$i<=$count;$i++){
            $url = $str.'/'.$i;
            self::add_img_file($id,$url);//开始保存图片
            echo "{$i}/$count\n";
        }
    }

    public static function add_img_file($id,$url){
        $res   = \Queue\MyCurl::send($url, array('ip'=>'127.0.0.1','Referer'=>'http://www.mzitu.com/116663/2'), 'get');
        $rules = array(
            //采集id为one这个元素里面的纯文本内容
            'img_url' => array(
                '.main-image img',
                'src'
            ),
        );//获取到了高清图片链接
        $hj    = QueryList::Query($res, $rules);
        $data  = $hj->getData(function ($x) {//总页数
            return $x;
        });
        $img_url = $data[0]['img_url'];
        $path = BASE_DIR.'/img/'.$id.'/';
        @mkdir($path,0777);//新建文件夹存取图片TODO缺少存进数据库
        chmod($path,0777);
        $file_path = $path.substr($img_url,strripos($img_url,'/')+1);
//        var_dump($file_path);
        $data = MyCurl::send($img_url);
        $write = @fopen($file_path, "w+");
        fwrite($write, $data);
        fclose($write);//存取图片
    }

}
封装redis.php类
<?php
namespace Queue;
class Redis
{
    private $con;
    protected static $instance;
    protected $tryConnectTimes = 0;
    protected $maxTryConnectTimes = 3;
    function __construct()
    {
        $this->connect();
    }
    function connect(){
        $this->tryConnectTimes++;
        $conf = array(
            "HOST"=>'127.0.0.1',
            "PORT"=>6379,
            "AUTH"=>""
        );
        $this->con = new \Redis();
        $this->con->connect($conf['HOST'], $conf['PORT'],2);
        $this->con->auth($conf['AUTH']);
        if(!$this->ping()){
            if($this->tryConnectTimes <= $this->maxTryConnectTimes){
                return $this->connect();
            }else{
                trigger_error("redis connect fail");
                return null;
            }
        }
        $this->con->setOption(\Redis::OPT_SERIALIZER,\Redis::SERIALIZER_PHP);
    }
    static function getInstance(){
        if(is_object(self::$instance)){
            return self::$instance;
        }else{
            self::$instance = new Redis();
            return self::$instance;
        }
    }
    function rPush($key,$val){
        try{
            return $this->con->rpush($key,$val);
//            return $ret;
        }catch(\Exception $e){
            $this->connect();
            if($this->tryConnectTimes <= $this->maxTryConnectTimes){
                return $this->rPush($key,$val);
            }else{
                return false;
            }

        }

    }
    function lPop($key){
        try{
            return $this->con->lPop($key);
        }catch(\Exception $e){
            $this->connect();
            if($this->tryConnectTimes <= $this->maxTryConnectTimes){
                return $this->lPop($key);
            }else{
                return false;
            }

        }
    }
    function lSize($key){
        try{
            $ret = $this->con->lSize($key);
            return $ret;
        }catch(\Exception $e){
            $this->connect();
            if($this->tryConnectTimes <= $this->maxTryConnectTimes){
                return $this->lSize($key);
            }else{
                return false;
            }

        }
    }
    function getRedisConnect(){
        return $this->con;
    }
    function ping(){
        try{
            $ret = $this->con->ping();
            if(!empty($ret)){
                $this->tryConnectTimes = 0;
                return true;
            }else{
                return false;
            }
        }catch(\Exception $e){
            return false;
        }
    }

}
自动加载类
<?php
/**
 * 自动加载类
 * Created by PhpStorm.
 * User: tioncico
 * Date: 2017/11/5 0005
 * Time: 17:15
 */

namespace Queue;


class Loader
{
    /**
     * 自动加载
     * @param $class
     */
    static function autoload($class)
    {
        $file=BASE_DIR.'/'.str_replace('\\','/',$class).'.php';
//        var_dump($class);
        if(is_file($file)){
            require_once $file;
        }
    }
}再从https://querylist.cc/ 下载QueryList相关的插件

以下爬图,网站以http://www.mzitu.com 为例
新建个index.php,写入以下代码
error_reporting(E_ALL ^ E_NOTICE);//忽略Notice错误
define('BASE_DIR', dirname(dirname(__FILE__)));//定义上一级目录常量,用于自动加载
include_once 'Loader.php';//引入自动加载文件
include 'QueryList/phpQuery.php';//引入QueryList
include 'QueryList/QueryList.php';//引入QueryList
spl_autoload_register('\\Queue\\Loader::autoload');//注册自动加载方法
use QL\QueryList;

$url = 'http://www.mzitu.com/page/'   //妹纸图网站,page是页数

for ($i = 1; $i <= 169; $i++) {//目前总页数为169页,未做自动识别
    $url .= $i . '/';
    $res   = \Queue\MyCurl::send($url, array('ip'=>'127.0.0.1'), 'get');//开始以get方式获取网站html页面内容
    $rules = array(
        //采集规则,可看插件文档,这里采集的是显示的列表页的链接(点下去就是超清大图,贼爽)
        'img_li' => array(
            '#pins li>a',
            'href'
        ),
    );
//    var_dump($url);
//    var_dump($res);
    $hj    = QueryList::Query($res, $rules);
    $data  = $hj->getData(function ($x) {
        return $x;
    });
    //这里获取到了$i页的所有详情链接
//    var_dump($data);
    add_li($data);
//    break;
}
//print_r($data);
function add_li($data)
{//把内容写进redis队列,准备下一步的获取
    $redis = \Queue\Redis::getInstance();
    //TODO:简单例子,没有存取数据库,没有存取链接的详细文字说明,没有做该任务是否存在的判断
//    var_dump($redis);die;
    $key = 'img_li';
    //$name_key = 'img_id';
    foreach ($data as $va) {
       // $a_id = substr($va['img_li'],strripos($va['img_li'],'/')+1);
//        var_dump($a_id);
        ($id = $redis->rPush($key,$va['img_li']));//入列
    }
   /* while ($redis->lPop($key) !== false) {//这个方法内容为空则是清空队列,不为空则是消费队列

    }*/
    //var_dump($redis->getRedisConnect()->lrange($key, 0, 100));//打印出该队列0-100条数据
}
这样,入列工作就已经完成了,
下面是消费队列以及下载图片的例子
新建个worker.php
error_reporting(E_ALL ^ E_NOTICE);
define('BASE_DIR', dirname(dirname(__FILE__)));
include_once 'Loader.php';
spl_autoload_register('\\Queue\\Loader::autoload');
include 'QueryList/phpQuery.php';
include 'QueryList/QueryList.php';

  $redis = \Queue\Redis::getInstance();
    $key = 'img_li';
    $i=1;
    while (1) {//死循环不断判断是否存在任务
        $length = $redis->lSize($key);//获取redis队列是否有任务
        if ($length > 0) {
//            echo 1;
            $str = $redis->lPop($key);//出列一条
            echo '当前任务:'.$i."\n";
            \Queue\Down::add_img($str);//新增图片,往上看Down.php的说明
            echo '完成任务:'.$i."\n";
            $i++;
        }
//        die;
        sleep(1);//延时1秒再进行下次循环
    }
这样的话,就实现了一个异步队列处理下载图片的啦
如果需要完善,可使用swoole扩展开启多进程守护模式异步处理,写入log日志就能查看出任务状态
注意:Mycurl自行封装了解决防盗链url,自己写curl函数需要考虑来源url改成对应网站的
运行方法;首先php index.php 进行入列
再然后php worker.php 进行消费队列下载图片
可考虑使用swoole多进程,一步到位且开启多个消费队列进行处理下载图片
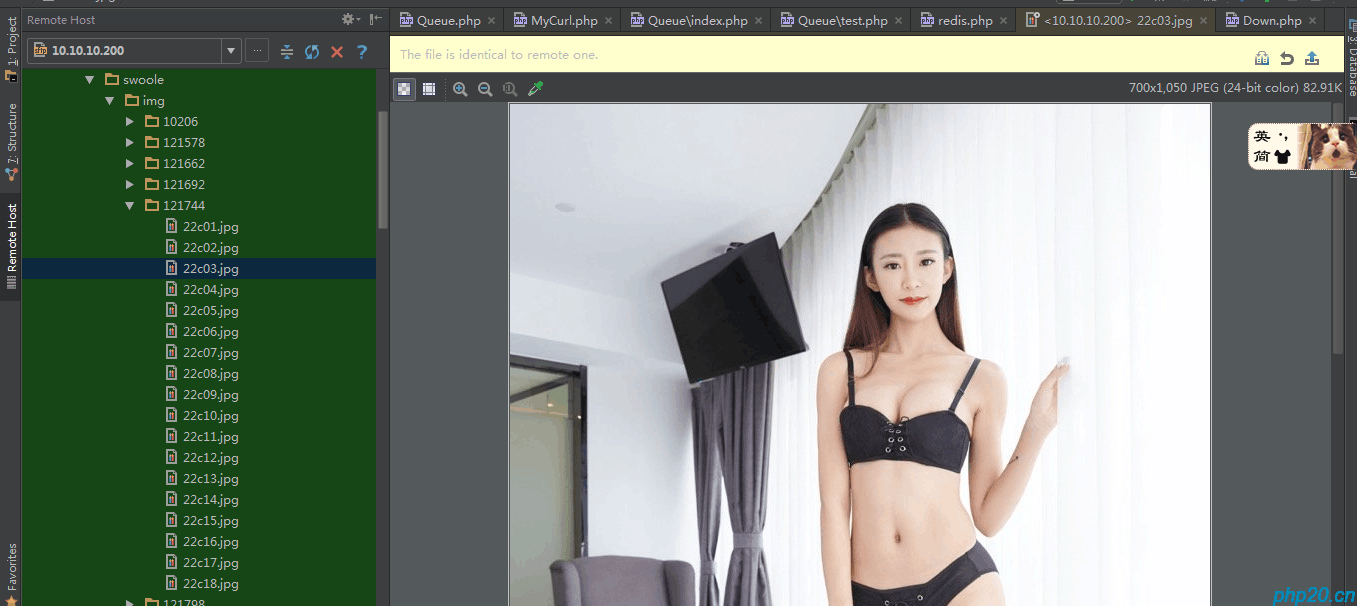
下面是爬取效果:


以上就是全部教程内容啦
仅有一个回复